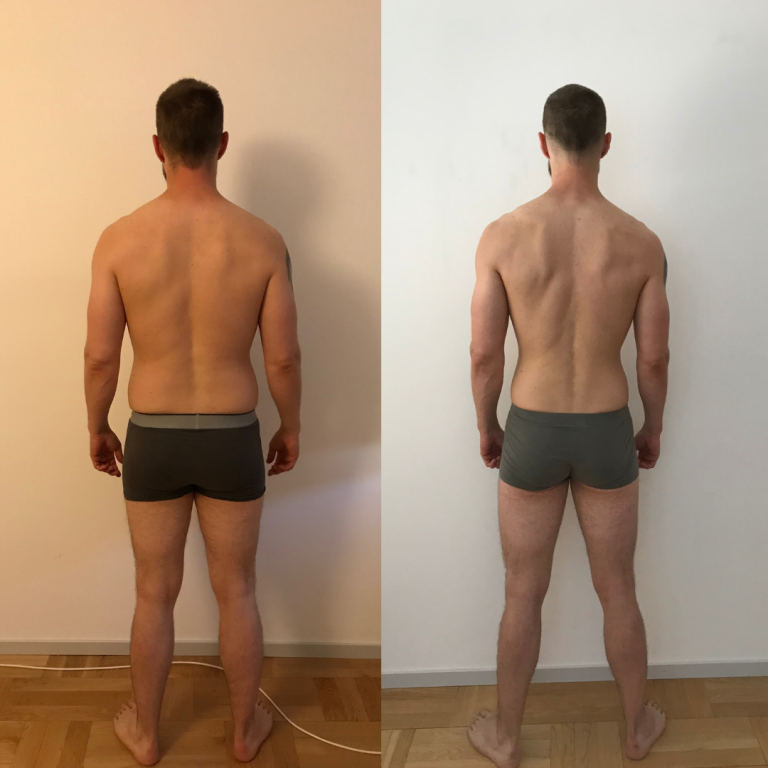
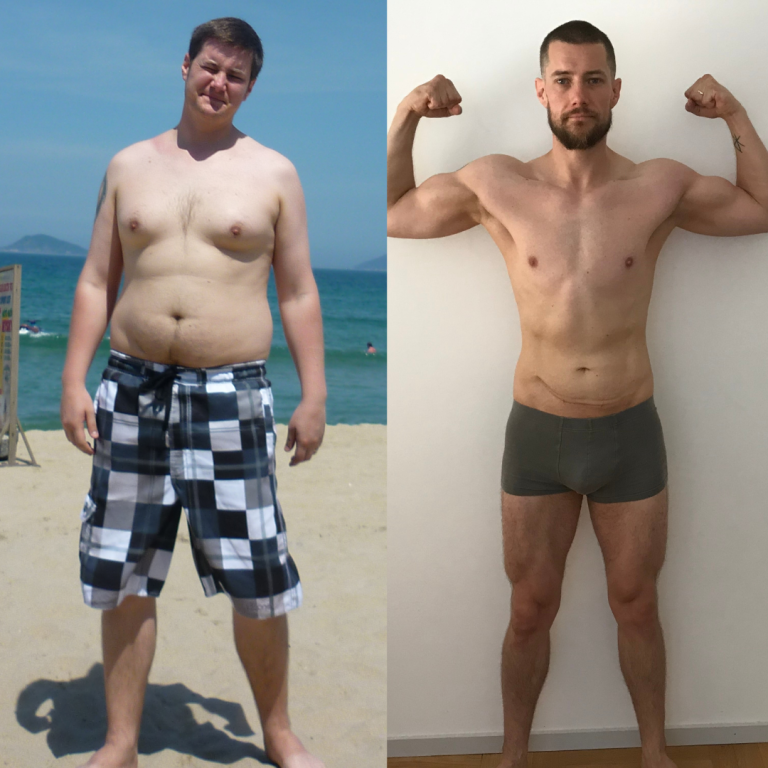
Contrary to popular belief, very few people want to lose weight. (They might just not realize it.) Instead, what they actually want is to improve their looks; dazzle their wives, impress their boyfriends, or just feel more comfortable on their beach vacation.
So why do we cling to using the scale as our only measurement of success?
Weight can go up and down regardless of what your body looks like. For beginners, this is an especially tricky minefield, as you might build muscle mass at the same rate that you lose fat mass. Such “body recomposition” is incredible for improving your looks but if the scale is your only tool then it might look as if nothing’s happening.
Just like you wouldn’t use the scale to see how tall someone is – height and weight are two completely different measurements – it’s also a clumsy instrument, at best, to track the aesthetics of your body.
The solution is to focus on what actually matters – how you look – and one excellent tool for this is progress photos.
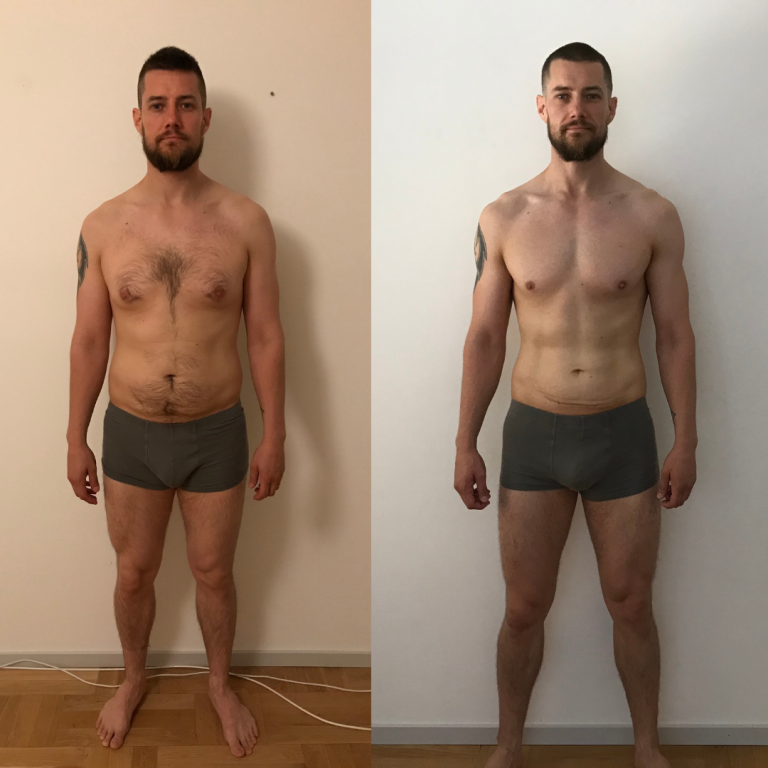
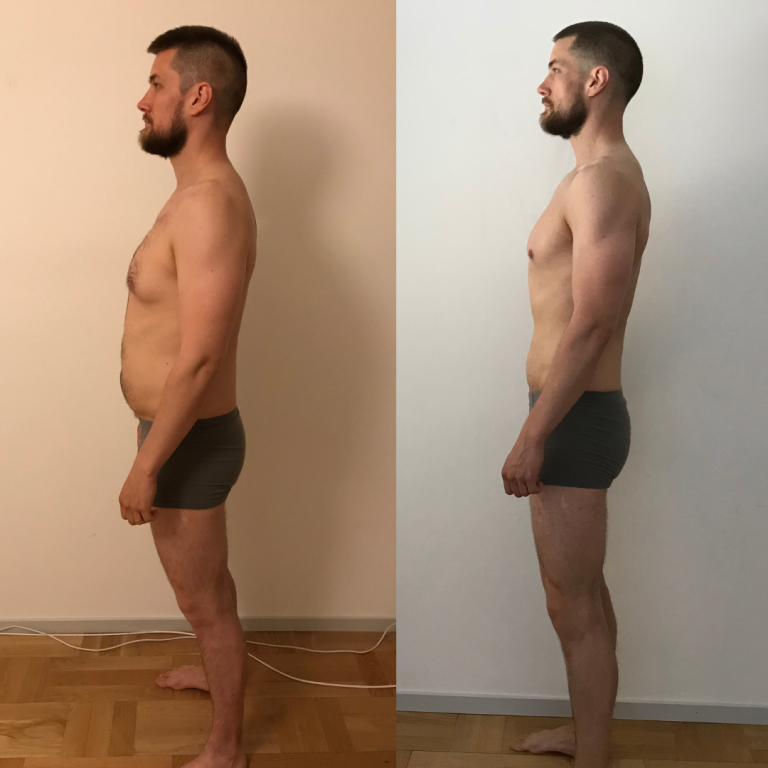
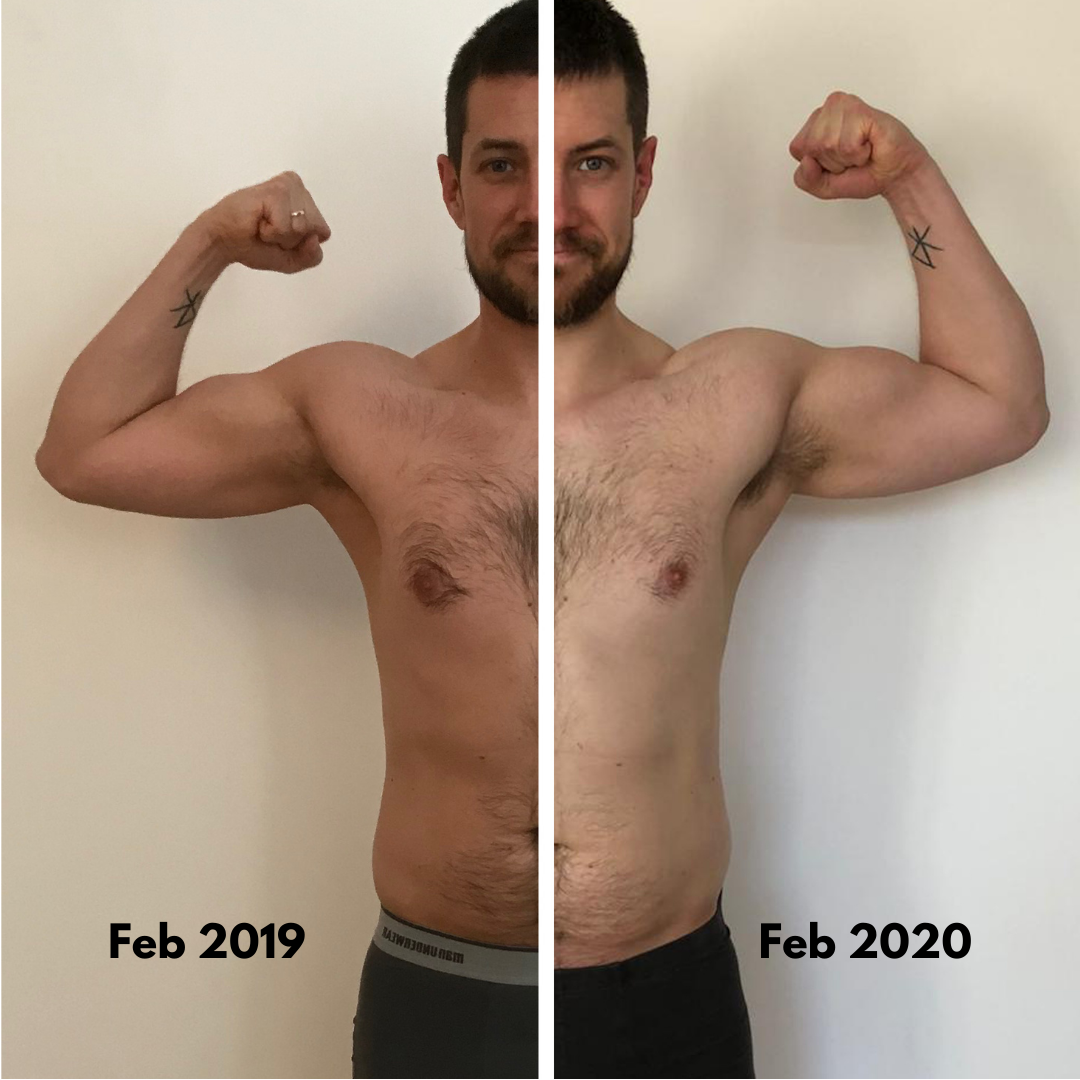
It’s very simple: you take a before photo when starting your journey and then add progress photos continuously as you go along until you wrap it up with a final after photo. This will give you an incredibly powerful tool to gauge your progress and keep you motivated.
The devil is in the details, however, and there are many traps you can fall into when taking before and after photos.
Trigger warning #
I’m generally not a huge fan of Trigger Warnings but it deserves some consideration here.
Before and after photos evoke strong emotional responses in a lot of people. That’s why they’re so ubiquitous in the fitness world, to begin with! Yet, how we react varies a lot between individuals.
Some people have a dysfunctional relationship to food and their bodies. Seeing others making huge changes to their bodies can normalize pathological behavior and worsen someone’s already bad mental health.
Other people feel inspired and motivated by seeing others succeed in their transformations. It proves that it’s possible and spurs them on to make changes for themselves.
Yet others are completely unaffected by seeing progress photos. They might not value physical improvement in any way or they might care more for performance goals – getting stronger, faster, or more skilled in a sport.
All responses are totally valid.
Compounding the issue for some people is the fact that what you see on social media is often manipulated. The before photos are made to look worse than they are and the after photos vastly exaggerated, not seldom with Photoshop or the like. PsychGuides has a great article on this fake industry.
With that in mind, we trust you to know yourself and make responsible decisions for your mental and physical health.
Taking before and after photos #
Before we look at how to actually take your progress photos, you first have to decide whether this tool is something you want to use. Is aesthetics an important factor for you and are you certain it won’t cause undue stress? If not, consider focusing your efforts elsewhere.
If you do want to proceed and start snapping your before and afters, there are four important aspects to consider: environment, timing, object, and subject.
Environment #
Any good photo starts with the ambiance and progress photos add to the checklist of things you have to get right.
Use the same location every time. There are too many variables to think about if you shoot the first photos in the locker room at your gym, the second batch in your living room, and a third set out in the forest.
Use natural light if possible (see below on timing) but don’t be afraid to go all artificial, so that you can control it and make certain it’s the same every time. Good lighting is nice but you’re not just looking to create a great photo, you want to create a consistent series of photos so that you can compare one to another.
Pick a background with as little visual clutter as possible. A simple, white wall is ideal.
Clean your room before immortalizing it in a photo. Remove dirty clothes, close cabinets, wipe the mirror. Be mindful of foggy mirrors if you want to take your photos after a shower.
Consider the availability of your chosen location. Will you be able to access it on will for the foreseeable future? This is one reason there’s no place like home.
Timing #
You want to limit the variables in your before and after photos, so to put more focus on your changes.
Take your photos at the same time of the same day. I prefer to do mine on Saturday mornings – before I’ve had any food fill out my belly and with plenty of time on my day off work.
Women might want to take their photos a week or so after the end of their period, so to avoid any undue bloating or water retention.
It might be tempting to snap some photos with a good pump right after hitting the gym but I recommend against it since it introduces too many variables to make for consistent, comparable progress photos. Definitely still snap some photos in the gym bathroom but don’t mix them up with your before and afters.
Decide on how often you want to take new photos – weekly, monthly, quarterly? Then set up calendar events or recurring tasks in your todo list. If you’re coached by Athlegan, we’ll remind you. ;)
Object #
Next up is a hugely important part of a before and after photo – yourself.
If you’re not feeling comfortable taking your first before photo, keep in mind that this is probably a reflection of your discomfort with your what your body looks like. That’s the very reason we’re doing this – we’re about to embark on a transformation journey to change and improve. It is what it is but this tool will help you make it what you want it to be.
You won’t ever notice a difference between two photos where you wear a hoodie and baggy jeans, so dress to reveal as much as possible. Underwear or swimwear is recommended but some light sports threads qualify as well.
Don’t pull your pants up to cover your belly or start being creative with what your hands are hiding. These photos are about flaunting what you actually look like today so that you can look back at it and compare to how you’ll look in the future.
I recommend always taking a series of photos without flexing your muscles and breathing out, so as to make changes more visible. You can choose to also do a series of flexed photos on top of this, which can be great for comparison when you’re trying to grow.
Look at old photos and try to pose the same every time. Be mindful of how you angle your head, where you put your hands, and what stance you take with your feet and legs.
Subject #
The final aspect is whoever or whatever controls the camera.
Get one photo each from the front, the back, and the side. Optionally, one other set of the same angles but with your muscles flexed.
The best way to take progress photos is by using a timer and camera stand or leaning the camera against something. It’ll hold the camera completely still and stable and it’s the easiest way to take consistent photos since you can position it in the exact same place every time.
Second best is getting help from someone else. It might be tricky to get someone to help you time and time again but this is a good option because it lets you forget about taking the actual photo, so you can instead focus on your posture and pose. Ask the person to lean against a wall or keep the camera close to their body, for more stability.
The last, but still viable, option is to take the photo yourself. A selfie stick can help but if you have to use a mirror, make sure no hair is in the way and that the camera itself doesn’t cover any essential part of your body.
Make sure your whole body is in the photo – from feet to head. It’s a common mistake to zoom in on an area you find particularly interesting but then you can easily miss progress elsewhere. Remember: the body decides where it takes fat from.
Try and take each photo from the same distance every time. A helpful landmark is to allow a consistent distance above the top of the head and below the bottom of the feet.
Remember, this is about taking a consistent series of photos, NOT just a great snapshot in time. These photos are primarily a tool for yourself and it might be that they are never seen by another person.
Which, incidentally, brings us to the final point I wanted to make.
Sharing your photos #
While the prospect of sharing half-naked photos of yourself might scare any sane person to death, this is no reason to avoid taking them in the first place.
It’s an incredibly powerful tool and you can reap all of its benefits without anyone else ever seeing your scantily-clad collection.
However, if you do want to proceed and share your photos, there are some things to consider:
Only compare yourself to your former self. Otherwise, you risk a completely unfair comparison, where your counterpart might have been working on their body for decades, had some stupid luck in the gene-lottery, or is a professional model with all the resources available to make themselves look awesome. If you’re improving, you’re improving.
A simple, free program is all you need to compose your final result. Instagram layout for iPhone or Android or Canva for desktop are some great options.
For the love of all that is holy, please put your before photo to the left and the after photo to the right. Unless you live in a culture where you read from right to left, positioning your photos in the reverse order is very confusing.
Finally, decide for yourself what is valuable to you. It’s completely natural and understandable to want to look a little better but if this becomes the only goal for all of your training and dieting endeavors, you run the risk of developing some pretty awful mental health problems.
You can want to improve your aesthetics while also getting stronger, faster, and healthier. They are usually not at odds with each other and you should celebrate progress in all areas.
Taking progress photos is a powerful tool but, remember, with great power comes great responsibility.
